
# createFolderWithTime.bat 创建以时间命名的文件夹 windows系统
md  %date:~0,4%_%date:~5,2%_%date:~8,2%_%time:~0,2%%time:~3,2%_
创建以时间命名的文件夹
发表在 默认分类
创建以时间命名的文件夹已关闭评论
移除“突然”出现的EFI分区
电脑突然出现一个299M大小的分区,查看应该是EFI分区,使用以下方法卸载。
C:\Users\abc> diskpart
Microsoft DiskPart 版本 10.0.18362.1

Copyright (C) Microsoft Corporation.
在计算机上: DESKTOP-IHIIS3L

DISKPART> list disk

  磁盘 ###  状态           大小     可用     Dyn  Gpt
  --------  -------------  -------  -------  ---  ---
  磁盘 0    联机              238 GB  1024 KB        *
  磁盘 1    联机              931 GB      0 B

DISKPART> select disk 0

磁盘 0 现在是所选磁盘。

DISKPART> list volume

  卷 ###      LTR  标签         FS     类型        大小     状态       信息
  ----------  ---  -----------  -----  ----------  -------  ---------  --------
  卷     0     C   系统           NTFS   磁盘分区         238 GB  正常         启动
  卷     1     F                FAT    磁盘分区         300 MB  正常         系统
  卷     2     D   新加卷          NTFS   磁盘分区         931 GB  正常

DISKPART> remove letter=F

没有选择卷。
请选择一个卷,再试一次。

DISKPART> remove letter=f

没有选择卷。
请选择一个卷,再试一次。

DISKPART> remove letter=f

没有选择卷。
请选择一个卷,再试一次。

DISKPART> select volume f

卷 1 是所选卷。

DISKPART> remove letter=f

DiskPart 成功地删除了驱动器号或装载点。

DISKPART>
发表在 默认分类
移除“突然”出现的EFI分区已关闭评论
CentOS 7 使用yum安装Docker CE
1: 安装必要的一些系统工具
[root@localhost]# sudo yum install -y yum-utils device-mapper-persistent-data lvm2
Failed to set locale, defaulting to C
Loaded plugins: fastestmirror
Determining fastest mirrors
* base: mirrors.tuna.tsinghua.edu.cn
* extras: mirrors.tuna.tsinghua.edu.cn
* updates: mirrors.tuna.tsinghua.edu.cn
base                                                                                             | 3.6 kB  00:00:00
extras                                                                                           | 2.9 kB  00:00:00
updates                                                                                          | 2.9 kB  00:00:00
(1/4): base/7/x86_64/group_gz                                                                    | 153 kB  00:00:00
(2/4): extras/7/x86_64/primary_db                                                                | 249 kB  00:00:00
(3/4): base/7/x86_64/primary_db                                                                  | 6.1 MB  00:00:01
(4/4): updates/7/x86_64/primary_db                                                               |  18 MB  00:00:05
Resolving Dependencies
--> Running transaction check
---> Package device-mapper-persistent-data.x86_64 0:0.7.3-3.el7 will be updated
---> Package device-mapper-persistent-data.x86_64 0:0.8.5-3.el7_9.2 will be an update
---> Package lvm2.x86_64 7:2.02.177-4.el7 will be updated
---> Package lvm2.x86_64 7:2.02.187-6.el7_9.5 will be an update
--> Processing Dependency: lvm2-libs = 7:2.02.187-6.el7_9.5 for package: 7:lvm2-2.02.187-6.el7_9.5.x86_64
---> Package yum-utils.noarch 0:1.1.31-54.el7_8 will be installed
--> Processing Dependency: python-kitchen for package: yum-utils-1.1.31-54.el7_8.noarch
--> Processing Dependency: libxml2-python for package: yum-utils-1.1.31-54.el7_8.noarch
--> Running transaction check
---> Package libxml2-python.x86_64 0:2.9.1-6.el7_9.6 will be installed
--> Processing Dependency: libxml2 = 2.9.1-6.el7_9.6 for package: libxml2-python-2.9.1-6.el7_9.6.x86_64
---> Package lvm2-libs.x86_64 7:2.02.177-4.el7 will be updated
---> Package lvm2-libs.x86_64 7:2.02.187-6.el7_9.5 will be an update
--> Processing Dependency: device-mapper-event = 7:1.02.170-6.el7_9.5 for package: 7:lvm2-libs-2.02.187-6.el7_9.5.x86_64
---> Package python-kitchen.noarch 0:1.1.1-5.el7 will be installed
--> Processing Dependency: python-chardet for package: python-kitchen-1.1.1-5.el7.noarch
--> Running transaction check
---> Package device-mapper-event.x86_64 7:1.02.146-4.el7 will be updated
---> Package device-mapper-event.x86_64 7:1.02.170-6.el7_9.5 will be an update
--> Processing Dependency: device-mapper-event-libs = 7:1.02.170-6.el7_9.5 for package: 7:device-mapper-event-1.02.170-6.el7_9.5.x86_64
--> Processing Dependency: device-mapper = 7:1.02.170-6.el7_9.5 for package: 7:device-mapper-event-1.02.170-6.el7_9.5.x86_64
---> Package libxml2.x86_64 0:2.9.1-6.el7_2.3 will be updated
---> Package libxml2.x86_64 0:2.9.1-6.el7_9.6 will be an update
---> Package python-chardet.noarch 0:2.2.1-3.el7 will be installed
--> Running transaction check
---> Package device-mapper.x86_64 7:1.02.146-4.el7 will be updated
--> Processing Dependency: device-mapper = 7:1.02.146-4.el7 for package: 7:device-mapper-libs-1.02.146-4.el7.x86_64
---> Package device-mapper.x86_64 7:1.02.170-6.el7_9.5 will be an update
---> Package device-mapper-event-libs.x86_64 7:1.02.146-4.el7 will be updated
---> Package device-mapper-event-libs.x86_64 7:1.02.170-6.el7_9.5 will be an update
--> Running transaction check
---> Package device-mapper-libs.x86_64 7:1.02.146-4.el7 will be updated
---> Package device-mapper-libs.x86_64 7:1.02.170-6.el7_9.5 will be an update
--> Finished Dependency Resolution
Dependencies Resolved
========================================================================================================================
Package                                  Arch              Version                            Repository          Size
========================================================================================================================
Installing:
yum-utils                                noarch            1.1.31-54.el7_8                    base               122 k
Updating:
device-mapper-persistent-data            x86_64            0.8.5-3.el7_9.2                    updates            423 k
lvm2                                     x86_64            7:2.02.187-6.el7_9.5               updates            1.3 M
Installing for dependencies:
libxml2-python                           x86_64            2.9.1-6.el7_9.6                    updates            247 k
python-chardet                           noarch            2.2.1-3.el7                        base               227 k
python-kitchen                           noarch            1.1.1-5.el7                        base               267 k
Updating for dependencies:
device-mapper                            x86_64            7:1.02.170-6.el7_9.5               updates            297 k
device-mapper-event                      x86_64            7:1.02.170-6.el7_9.5               updates            192 k
device-mapper-event-libs                 x86_64            7:1.02.170-6.el7_9.5               updates            192 k
device-mapper-libs                       x86_64            7:1.02.170-6.el7_9.5               updates            325 k
libxml2                                  x86_64            2.9.1-6.el7_9.6                    updates            668 k
lvm2-libs                                x86_64            7:2.02.187-6.el7_9.5               updates            1.1 M
Transaction Summary
========================================================================================================================
Install  1 Package  (+3 Dependent packages)
Upgrade  2 Packages (+6 Dependent packages)
Total download size: 5.3 M
Downloading packages:
Delta RPMs disabled because /usr/bin/applydeltarpm not installed.
warning: /var/cache/yum/x86_64/7/updates/packages/device-mapper-event-libs-1.02.170-6.el7_9.5.x86_64.rpm: Header V3 RSA/SHA256 Signature, key ID f4a80eb5: NOKEY
Public key for device-mapper-event-libs-1.02.170-6.el7_9.5.x86_64.rpm is not installed
(1/12): device-mapper-event-libs-1.02.170-6.el7_9.5.x86_64.rpm                                   | 192 kB  00:00:00
(2/12): device-mapper-libs-1.02.170-6.el7_9.5.x86_64.rpm                                         | 325 kB  00:00:00
(3/12): device-mapper-persistent-data-0.8.5-3.el7_9.2.x86_64.rpm                                 | 423 kB  00:00:00
(4/12): libxml2-python-2.9.1-6.el7_9.6.x86_64.rpm                                                | 247 kB  00:00:00
(5/12): libxml2-2.9.1-6.el7_9.6.x86_64.rpm                                                       | 668 kB  00:00:00
(6/12): device-mapper-1.02.170-6.el7_9.5.x86_64.rpm                                              | 297 kB  00:00:00
(7/12): lvm2-libs-2.02.187-6.el7_9.5.x86_64.rpm                                                  | 1.1 MB  00:00:00
(8/12): lvm2-2.02.187-6.el7_9.5.x86_64.rpm                                                       | 1.3 MB  00:00:00
Public key for yum-utils-1.1.31-54.el7_8.noarch.rpm is not installed
(9/12): yum-utils-1.1.31-54.el7_8.noarch.rpm                                                     | 122 kB  00:00:00
(10/12): python-kitchen-1.1.1-5.el7.noarch.rpm                                                   | 267 kB  00:00:00
(11/12): python-chardet-2.2.1-3.el7.noarch.rpm                                                   | 227 kB  00:00:00
(12/12): device-mapper-event-1.02.170-6.el7_9.5.x86_64.rpm                                       | 192 kB  00:00:02
------------------------------------------------------------------------------------------------------------------------
Total                                                                                   2.0 MB/s | 5.3 MB  00:00:02
Retrieving key from file:///etc/pki/rpm-gpg/RPM-GPG-KEY-CentOS-7
Importing GPG key 0xF4A80EB5:
Userid     : "CentOS-7 Key (CentOS 7 Official Signing Key) <security@centos.org>"
Fingerprint: 6341 ab27 53d7 8a78 a7c2 7bb1 24c6 a8a7 f4a8 0eb5
Package    : centos-release-7-5.1804.el7.centos.x86_64 (@anaconda)
From       : /etc/pki/rpm-gpg/RPM-GPG-KEY-CentOS-7
Running transaction check
Running transaction test
Transaction test succeeded
Running transaction
Updating   : 7:device-mapper-libs-1.02.170-6.el7_9.5.x86_64                                                      1/20
Updating   : 7:device-mapper-1.02.170-6.el7_9.5.x86_64                                                           2/20
Updating   : 7:device-mapper-event-libs-1.02.170-6.el7_9.5.x86_64                                                3/20
Updating   : 7:device-mapper-event-1.02.170-6.el7_9.5.x86_64                                                     4/20
Updating   : 7:lvm2-libs-2.02.187-6.el7_9.5.x86_64                                                               5/20
Updating   : device-mapper-persistent-data-0.8.5-3.el7_9.2.x86_64                                                6/20
Updating   : libxml2-2.9.1-6.el7_9.6.x86_64                                                                      7/20
Installing : libxml2-python-2.9.1-6.el7_9.6.x86_64                                                               8/20
Installing : python-chardet-2.2.1-3.el7.noarch                                                                   9/20
Installing : python-kitchen-1.1.1-5.el7.noarch                                                                  10/20
Installing : yum-utils-1.1.31-54.el7_8.noarch                                                                   11/20
Updating   : 7:lvm2-2.02.187-6.el7_9.5.x86_64                                                                   12/20
Cleanup    : 7:lvm2-2.02.177-4.el7.x86_64                                                                       13/20
Cleanup    : 7:lvm2-libs-2.02.177-4.el7.x86_64                                                                  14/20
Cleanup    : 7:device-mapper-event-1.02.146-4.el7.x86_64                                                        15/20
Cleanup    : 7:device-mapper-event-libs-1.02.146-4.el7.x86_64                                                   16/20
Cleanup    : 7:device-mapper-1.02.146-4.el7.x86_64                                                              17/20
Cleanup    : 7:device-mapper-libs-1.02.146-4.el7.x86_64                                                         18/20
Cleanup    : device-mapper-persistent-data-0.7.3-3.el7.x86_64                                                   19/20
Cleanup    : libxml2-2.9.1-6.el7_2.3.x86_64                                                                     20/20
Verifying  : 7:lvm2-2.02.187-6.el7_9.5.x86_64                                                                    1/20
Verifying  : python-chardet-2.2.1-3.el7.noarch                                                                   2/20
Verifying  : libxml2-2.9.1-6.el7_9.6.x86_64                                                                      3/20
Verifying  : 7:lvm2-libs-2.02.187-6.el7_9.5.x86_64                                                               4/20
Verifying  : 7:device-mapper-1.02.170-6.el7_9.5.x86_64                                                           5/20
Verifying  : libxml2-python-2.9.1-6.el7_9.6.x86_64                                                               6/20
Verifying  : device-mapper-persistent-data-0.8.5-3.el7_9.2.x86_64                                                7/20
Verifying  : 7:device-mapper-event-1.02.170-6.el7_9.5.x86_64                                                     8/20
Verifying  : python-kitchen-1.1.1-5.el7.noarch                                                                   9/20
Verifying  : 7:device-mapper-libs-1.02.170-6.el7_9.5.x86_64                                                     10/20
Verifying  : yum-utils-1.1.31-54.el7_8.noarch                                                                   11/20
Verifying  : 7:device-mapper-event-libs-1.02.170-6.el7_9.5.x86_64                                               12/20
Verifying  : device-mapper-persistent-data-0.7.3-3.el7.x86_64                                                   13/20
Verifying  : 7:device-mapper-event-libs-1.02.146-4.el7.x86_64                                                   14/20
Verifying  : libxml2-2.9.1-6.el7_2.3.x86_64                                                                     15/20
Verifying  : 7:device-mapper-1.02.146-4.el7.x86_64                                                              16/20
Verifying  : 7:device-mapper-libs-1.02.146-4.el7.x86_64                                                         17/20
Verifying  : 7:device-mapper-event-1.02.146-4.el7.x86_64                                                        18/20
Verifying  : 7:lvm2-libs-2.02.177-4.el7.x86_64                                                                  19/20
Verifying  : 7:lvm2-2.02.177-4.el7.x86_64                                                                       20/20
Installed:
yum-utils.noarch 0:1.1.31-54.el7_8
Dependency Installed:
libxml2-python.x86_64 0:2.9.1-6.el7_9.6   python-chardet.noarch 0:2.2.1-3.el7   python-kitchen.noarch 0:1.1.1-5.el7
Updated:
device-mapper-persistent-data.x86_64 0:0.8.5-3.el7_9.2                lvm2.x86_64 7:2.02.187-6.el7_9.5
Dependency Updated:
device-mapper.x86_64 7:1.02.170-6.el7_9.5                     device-mapper-event.x86_64 7:1.02.170-6.el7_9.5
device-mapper-event-libs.x86_64 7:1.02.170-6.el7_9.5          device-mapper-libs.x86_64 7:1.02.170-6.el7_9.5
libxml2.x86_64 0:2.9.1-6.el7_9.6                              lvm2-libs.x86_64 7:2.02.187-6.el7_9.5
Complete!
2: 添加软件源信息
[root@localhost]# sudo yum-config-manager --add-repo http://mirrors.aliyun.com/docker-ce/linux/centos/docker-ce.repo
Failed to set locale, defaulting to C
Loaded plugins: fastestmirror
adding repo from: http://mirrors.aliyun.com/docker-ce/linux/centos/docker-ce.repo
grabbing file http://mirrors.aliyun.com/docker-ce/linux/centos/docker-ce.repo to /etc/yum.repos.d/docker-ce.repo
repo saved to /etc/yum.repos.d/docker-ce.repo
3: 更新并安装 Docker-CE
[root@localhost]# sudo yum makecache fast
Failed to set locale, defaulting to C
Loaded plugins: fastestmirror
Loading mirror speeds from cached hostfile
* base: mirrors.tuna.tsinghua.edu.cn
* extras: mirrors.tuna.tsinghua.edu.cn
* updates: mirrors.tuna.tsinghua.edu.cn
base | 3.6 kB 00:00:00
docker-ce-stable | 3.5 kB 00:00:00
extras | 2.9 kB 00:00:00
updates | 2.9 kB 00:00:00
(1/2): docker-ce-stable/7/x86_64/updateinfo | 55 B 00:00:00
(2/2): docker-ce-stable/7/x86_64/primary_db | 90 kB 00:00:01
Metadata Cache Created
[root@localhost]# sudo yum -y install docker-ce
Failed to set locale, defaulting to C
Loaded plugins: fastestmirror
Loading mirror speeds from cached hostfile
* base: mirrors.tuna.tsinghua.edu.cn
* extras: mirrors.tuna.tsinghua.edu.cn
* updates: mirrors.tuna.tsinghua.edu.cn
Resolving Dependencies
--> Running transaction check
---> Package docker-ce.x86_64 3:20.10.22-3.el7 will be installed
--> Processing Dependency: container-selinux >= 2:2.74 for package: 3:docker-ce-20.10.22-3.el7.x86_64
--> Processing Dependency: containerd.io >= 1.4.1 for package: 3:docker-ce-20.10.22-3.el7.x86_64
--> Processing Dependency: libseccomp >= 2.3 for package: 3:docker-ce-20.10.22-3.el7.x86_64
--> Processing Dependency: docker-ce-cli for package: 3:docker-ce-20.10.22-3.el7.x86_64
--> Processing Dependency: docker-ce-rootless-extras for package: 3:docker-ce-20.10.22-3.el7.x86_64
--> Processing Dependency: libcgroup for package: 3:docker-ce-20.10.22-3.el7.x86_64
--> Running transaction check
---> Package container-selinux.noarch 2:2.119.2-1.911c772.el7_8 will be installed
--> Processing Dependency: selinux-policy-targeted >= 3.13.1-216.el7 for package: 2:container-selinux-2.119.2-1.911c772.el7_8.noarch
--> Processing Dependency: selinux-policy-base >= 3.13.1-216.el7 for package: 2:container-selinux-2.119.2-1.911c772.el7_8.noarch
--> Processing Dependency: selinux-policy >= 3.13.1-216.el7 for package: 2:container-selinux-2.119.2-1.911c772.el7_8.noarch
--> Processing Dependency: policycoreutils-python for package: 2:container-selinux-2.119.2-1.911c772.el7_8.noarch
---> Package containerd.io.x86_64 0:1.6.13-3.1.el7 will be installed
---> Package docker-ce-cli.x86_64 1:20.10.22-3.el7 will be installed
--> Processing Dependency: docker-scan-plugin(x86-64) for package: 1:docker-ce-cli-20.10.22-3.el7.x86_64
---> Package docker-ce-rootless-extras.x86_64 0:20.10.22-3.el7 will be installed
--> Processing Dependency: fuse-overlayfs >= 0.7 for package: docker-ce-rootless-extras-20.10.22-3.el7.x86_64
--> Processing Dependency: slirp4netns >= 0.4 for package: docker-ce-rootless-extras-20.10.22-3.el7.x86_64
---> Package libcgroup.x86_64 0:0.41-21.el7 will be installed
---> Package libseccomp.x86_64 0:2.3.1-4.el7 will be installed
--> Running transaction check
---> Package docker-scan-plugin.x86_64 0:0.23.0-3.el7 will be installed
---> Package fuse-overlayfs.x86_64 0:0.7.2-6.el7_8 will be installed
--> Processing Dependency: libfuse3.so.3(FUSE_3.2)(64bit) for package: fuse-overlayfs-0.7.2-6.el7_8.x86_64
--> Processing Dependency: libfuse3.so.3(FUSE_3.0)(64bit) for package: fuse-overlayfs-0.7.2-6.el7_8.x86_64
--> Processing Dependency: libfuse3.so.3()(64bit) for package: fuse-overlayfs-0.7.2-6.el7_8.x86_64
---> Package policycoreutils-python.x86_64 0:2.5-34.el7 will be installed
--> Processing Dependency: policycoreutils = 2.5-34.el7 for package: policycoreutils-python-2.5-34.el7.x86_64
--> Processing Dependency: setools-libs >= 3.3.8-4 for package: policycoreutils-python-2.5-34.el7.x86_64
--> Processing Dependency: libsemanage-python >= 2.5-14 for package: policycoreutils-python-2.5-34.el7.x86_64
--> Processing Dependency: audit-libs-python >= 2.1.3-4 for package: policycoreutils-python-2.5-34.el7.x86_64
--> Processing Dependency: python-IPy for package: policycoreutils-python-2.5-34.el7.x86_64
--> Processing Dependency: libqpol.so.1(VERS_1.4)(64bit) for package: policycoreutils-python-2.5-34.el7.x86_64
--> Processing Dependency: libqpol.so.1(VERS_1.2)(64bit) for package: policycoreutils-python-2.5-34.el7.x86_64
--> Processing Dependency: libapol.so.4(VERS_4.0)(64bit) for package: policycoreutils-python-2.5-34.el7.x86_64
--> Processing Dependency: checkpolicy for package: policycoreutils-python-2.5-34.el7.x86_64
--> Processing Dependency: libqpol.so.1()(64bit) for package: policycoreutils-python-2.5-34.el7.x86_64
--> Processing Dependency: libapol.so.4()(64bit) for package: policycoreutils-python-2.5-34.el7.x86_64
---> Package selinux-policy.noarch 0:3.13.1-192.el7 will be updated
---> Package selinux-policy.noarch 0:3.13.1-268.el7_9.2 will be an update
--> Processing Dependency: libsemanage >= 2.5-13 for package: selinux-policy-3.13.1-268.el7_9.2.noarch
---> Package selinux-policy-targeted.noarch 0:3.13.1-192.el7 will be updated
---> Package selinux-policy-targeted.noarch 0:3.13.1-268.el7_9.2 will be an update
---> Package slirp4netns.x86_64 0:0.4.3-4.el7_8 will be installed
--> Running transaction check
---> Package audit-libs-python.x86_64 0:2.8.5-4.el7 will be installed
--> Processing Dependency: audit-libs(x86-64) = 2.8.5-4.el7 for package: audit-libs-python-2.8.5-4.el7.x86_64
---> Package checkpolicy.x86_64 0:2.5-8.el7 will be installed
---> Package fuse3-libs.x86_64 0:3.6.1-4.el7 will be installed
---> Package libsemanage.x86_64 0:2.5-11.el7 will be updated
---> Package libsemanage.x86_64 0:2.5-14.el7 will be an update
--> Processing Dependency: libsepol >= 2.5-10 for package: libsemanage-2.5-14.el7.x86_64
--> Processing Dependency: libselinux >= 2.5-14 for package: libsemanage-2.5-14.el7.x86_64
---> Package libsemanage-python.x86_64 0:2.5-14.el7 will be installed
---> Package policycoreutils.x86_64 0:2.5-22.el7 will be updated
---> Package policycoreutils.x86_64 0:2.5-34.el7 will be an update
--> Processing Dependency: libselinux-utils >= 2.5-14 for package: policycoreutils-2.5-34.el7.x86_64
---> Package python-IPy.noarch 0:0.75-6.el7 will be installed
---> Package setools-libs.x86_64 0:3.3.8-4.el7 will be installed
--> Running transaction check
---> Package audit-libs.x86_64 0:2.8.1-3.el7 will be updated
--> Processing Dependency: audit-libs(x86-64) = 2.8.1-3.el7 for package: audit-2.8.1-3.el7.x86_64
---> Package audit-libs.x86_64 0:2.8.5-4.el7 will be an update
---> Package libselinux.x86_64 0:2.5-12.el7 will be updated
--> Processing Dependency: libselinux(x86-64) = 2.5-12.el7 for package: libselinux-python-2.5-12.el7.x86_64
---> Package libselinux.x86_64 0:2.5-15.el7 will be an update
---> Package libselinux-utils.x86_64 0:2.5-12.el7 will be updated
---> Package libselinux-utils.x86_64 0:2.5-15.el7 will be an update
---> Package libsepol.x86_64 0:2.5-8.1.el7 will be updated
---> Package libsepol.x86_64 0:2.5-10.el7 will be an update
--> Running transaction check
---> Package audit.x86_64 0:2.8.1-3.el7 will be updated
---> Package audit.x86_64 0:2.8.5-4.el7 will be an update
---> Package libselinux-python.x86_64 0:2.5-12.el7 will be updated
---> Package libselinux-python.x86_64 0:2.5-15.el7 will be an update
--> Finished Dependency Resolution
Dependencies Resolved
========================================================================================================================
Package Arch Version Repository Size
========================================================================================================================
Installing:
docker-ce x86_64 3:20.10.22-3.el7 docker-ce-stable 22 M
Installing for dependencies:
audit-libs-python x86_64 2.8.5-4.el7 base 76 k
checkpolicy x86_64 2.5-8.el7 base 295 k
container-selinux noarch 2:2.119.2-1.911c772.el7_8 extras 40 k
containerd.io x86_64 1.6.13-3.1.el7 docker-ce-stable 33 M
docker-ce-cli x86_64 1:20.10.22-3.el7 docker-ce-stable 30 M
docker-ce-rootless-extras x86_64 20.10.22-3.el7 docker-ce-stable 8.5 M
docker-scan-plugin x86_64 0.23.0-3.el7 docker-ce-stable 3.8 M
fuse-overlayfs x86_64 0.7.2-6.el7_8 extras 54 k
fuse3-libs x86_64 3.6.1-4.el7 extras 82 k
libcgroup x86_64 0.41-21.el7 base 66 k
libseccomp x86_64 2.3.1-4.el7 base 56 k
libsemanage-python x86_64 2.5-14.el7 base 113 k
policycoreutils-python x86_64 2.5-34.el7 base 457 k
python-IPy noarch 0.75-6.el7 base 32 k
setools-libs x86_64 3.3.8-4.el7 base 620 k
slirp4netns x86_64 0.4.3-4.el7_8 extras 81 k
Updating for dependencies:
audit x86_64 2.8.5-4.el7 base 256 k
audit-libs x86_64 2.8.5-4.el7 base 102 k
libselinux x86_64 2.5-15.el7 base 162 k
libselinux-python x86_64 2.5-15.el7 base 236 k
libselinux-utils x86_64 2.5-15.el7 base 151 k
libsemanage x86_64 2.5-14.el7 base 151 k
libsepol x86_64 2.5-10.el7 base 297 k
policycoreutils x86_64 2.5-34.el7 base 917 k
selinux-policy noarch 3.13.1-268.el7_9.2 updates 498 k
selinux-policy-targeted noarch 3.13.1-268.el7_9.2 updates 7.0 M
Transaction Summary
========================================================================================================================
Install 1 Package (+16 Dependent packages)
Upgrade ( 10 Dependent packages)
Total download size: 108 M
Downloading packages:
Delta RPMs disabled because /usr/bin/applydeltarpm not installed.
(1/27): audit-2.8.5-4.el7.x86_64.rpm | 256 kB 00:00:00
(2/27): checkpolicy-2.5-8.el7.x86_64.rpm | 295 kB 00:00:00
(3/27): audit-libs-2.8.5-4.el7.x86_64.rpm | 102 kB 00:00:00
(4/27): audit-libs-python-2.8.5-4.el7.x86_64.rpm | 76 kB 00:00:00
(5/27): container-selinux-2.119.2-1.911c772.el7_8.noarch.rpm | 40 kB 00:00:00
warning: /var/cache/yum/x86_64/7/docker-ce-stable/packages/docker-ce-20.10.22-3.el7.x86_64.rpm: Header V4 RSA/SHA512 Signature, key ID 621e9f35: NOKEY
Public key for docker-ce-20.10.22-3.el7.x86_64.rpm is not installed
(6/27): docker-ce-20.10.22-3.el7.x86_64.rpm | 22 MB 00:02:14
(7/27): containerd.io-1.6.13-3.1.el7.x86_64.rpm | 33 MB 00:03:26
(8/27): docker-ce-rootless-extras-20.10.22-3.el7.x86_64.rpm | 8.5 MB 00:00:52
(9/27): fuse-overlayfs-0.7.2-6.el7_8.x86_64.rpm | 54 kB 00:00:00
(10/27): libcgroup-0.41-21.el7.x86_64.rpm | 66 kB 00:00:00
(11/27): libseccomp-2.3.1-4.el7.x86_64.rpm | 56 kB 00:00:00
(12/27): libselinux-python-2.5-15.el7.x86_64.rpm | 236 kB 00:00:00
(13/27): libselinux-utils-2.5-15.el7.x86_64.rpm | 151 kB 00:00:00
(14/27): libsemanage-2.5-14.el7.x86_64.rpm | 151 kB 00:00:00
(15/27): libsemanage-python-2.5-14.el7.x86_64.rpm | 113 kB 00:00:00
(16/27): libsepol-2.5-10.el7.x86_64.rpm | 297 kB 00:00:00
(17/27): policycoreutils-2.5-34.el7.x86_64.rpm | 917 kB 00:00:00
(18/27): fuse3-libs-3.6.1-4.el7.x86_64.rpm | 82 kB 00:00:01
(19/27): policycoreutils-python-2.5-34.el7.x86_64.rpm | 457 kB 00:00:00
(20/27): libselinux-2.5-15.el7.x86_64.rpm | 162 kB 00:00:01
(21/27): python-IPy-0.75-6.el7.noarch.rpm | 32 kB 00:00:00
(22/27): setools-libs-3.3.8-4.el7.x86_64.rpm | 620 kB 00:00:00
(23/27): slirp4netns-0.4.3-4.el7_8.x86_64.rpm | 81 kB 00:00:00
(24/27): selinux-policy-3.13.1-268.el7_9.2.noarch.rpm | 498 kB 00:00:01
(25/27): selinux-policy-targeted-3.13.1-268.el7_9.2.noarch.rpm | 7.0 MB 00:00:01
(26/27): docker-scan-plugin-0.23.0-3.el7.x86_64.rpm | 3.8 MB 00:00:24
(27/27): docker-ce-cli-20.10.22-3.el7.x86_64.rpm | 30 MB 00:03:07
------------------------------------------------------------------------------------------------------------------------
Total 343 kB/s | 108 MB 00:05:22
Retrieving key from https://mirrors.aliyun.com/docker-ce/linux/centos/gpg
Importing GPG key 0x621E9F35:
Userid : "Docker Release (CE rpm) <docker@docker.com>"
Fingerprint: 060a 61c5 1b55 8a7f 742b 77aa c52f eb6b 621e 9f35
From : https://mirrors.aliyun.com/docker-ce/linux/centos/gpg
Running transaction check
Running transaction test
Transaction test succeeded
Running transaction
Updating : libsepol-2.5-10.el7.x86_64 1/37
Updating : libselinux-2.5-15.el7.x86_64 2/37
Updating : audit-libs-2.8.5-4.el7.x86_64 3/37
Updating : libsemanage-2.5-14.el7.x86_64 4/37
Installing : libseccomp-2.3.1-4.el7.x86_64 5/37
Updating : libselinux-utils-2.5-15.el7.x86_64 6/37
Updating : policycoreutils-2.5-34.el7.x86_64 7/37
Updating : selinux-policy-3.13.1-268.el7_9.2.noarch 8/37
Installing : libcgroup-0.41-21.el7.x86_64 9/37
Updating : selinux-policy-targeted-3.13.1-268.el7_9.2.noarch 10/37
Installing : slirp4netns-0.4.3-4.el7_8.x86_64 11/37
Installing : libsemanage-python-2.5-14.el7.x86_64 12/37
Installing : audit-libs-python-2.8.5-4.el7.x86_64 13/37
Installing : setools-libs-3.3.8-4.el7.x86_64 14/37
Updating : libselinux-python-2.5-15.el7.x86_64 15/37
Installing : docker-scan-plugin-0.23.0-3.el7.x86_64 16/37
Installing : 1:docker-ce-cli-20.10.22-3.el7.x86_64 17/37
Installing : python-IPy-0.75-6.el7.noarch 18/37
Installing : checkpolicy-2.5-8.el7.x86_64 19/37
Installing : policycoreutils-python-2.5-34.el7.x86_64 20/37
Installing : 2:container-selinux-2.119.2-1.911c772.el7_8.noarch 21/37
Installing : containerd.io-1.6.13-3.1.el7.x86_64 22/37
Installing : fuse3-libs-3.6.1-4.el7.x86_64 23/37
Installing : fuse-overlayfs-0.7.2-6.el7_8.x86_64 24/37
Installing : docker-ce-rootless-extras-20.10.22-3.el7.x86_64 25/37
Installing : 3:docker-ce-20.10.22-3.el7.x86_64 26/37
Updating : audit-2.8.5-4.el7.x86_64 27/37
Cleanup : selinux-policy-targeted-3.13.1-192.el7.noarch 28/37
Cleanup : selinux-policy-3.13.1-192.el7.noarch 29/37
Cleanup : policycoreutils-2.5-22.el7.x86_64 30/37
Cleanup : libsemanage-2.5-11.el7.x86_64 31/37
Cleanup : libselinux-utils-2.5-12.el7.x86_64 32/37
Cleanup : libselinux-python-2.5-12.el7.x86_64 33/37
Cleanup : libselinux-2.5-12.el7.x86_64 34/37
Cleanup : audit-2.8.1-3.el7.x86_64 35/37
Cleanup : audit-libs-2.8.1-3.el7.x86_64 36/37
Cleanup : libsepol-2.5-8.1.el7.x86_64 37/37
Verifying : 3:docker-ce-20.10.22-3.el7.x86_64 1/37
Verifying : fuse-overlayfs-0.7.2-6.el7_8.x86_64 2/37
Verifying : libselinux-2.5-15.el7.x86_64 3/37
Verifying : 2:container-selinux-2.119.2-1.911c772.el7_8.noarch 4/37
Verifying : fuse3-libs-3.6.1-4.el7.x86_64 5/37
Verifying : selinux-policy-targeted-3.13.1-268.el7_9.2.noarch 6/37
Verifying : audit-libs-2.8.5-4.el7.x86_64 7/37
Verifying : checkpolicy-2.5-8.el7.x86_64 8/37
Verifying : docker-ce-rootless-extras-20.10.22-3.el7.x86_64 9/37
Verifying : policycoreutils-2.5-34.el7.x86_64 10/37
Verifying : python-IPy-0.75-6.el7.noarch 11/37
Verifying : libseccomp-2.3.1-4.el7.x86_64 12/37
Verifying : libselinux-utils-2.5-15.el7.x86_64 13/37
Verifying : policycoreutils-python-2.5-34.el7.x86_64 14/37
Verifying : setools-libs-3.3.8-4.el7.x86_64 15/37
Verifying : libsemanage-python-2.5-14.el7.x86_64 16/37
Verifying : docker-scan-plugin-0.23.0-3.el7.x86_64 17/37
Verifying : audit-2.8.5-4.el7.x86_64 18/37
Verifying : containerd.io-1.6.13-3.1.el7.x86_64 19/37
Verifying : libsemanage-2.5-14.el7.x86_64 20/37
Verifying : slirp4netns-0.4.3-4.el7_8.x86_64 21/37
Verifying : 1:docker-ce-cli-20.10.22-3.el7.x86_64 22/37
Verifying : libselinux-python-2.5-15.el7.x86_64 23/37
Verifying : selinux-policy-3.13.1-268.el7_9.2.noarch 24/37
Verifying : audit-libs-python-2.8.5-4.el7.x86_64 25/37
Verifying : libsepol-2.5-10.el7.x86_64 26/37
Verifying : libcgroup-0.41-21.el7.x86_64 27/37
Verifying : libsemanage-2.5-11.el7.x86_64 28/37
Verifying : libselinux-python-2.5-12.el7.x86_64 29/37
Verifying : audit-libs-2.8.1-3.el7.x86_64 30/37
Verifying : policycoreutils-2.5-22.el7.x86_64 31/37
Verifying : libsepol-2.5-8.1.el7.x86_64 32/37
Verifying : audit-2.8.1-3.el7.x86_64 33/37
Verifying : selinux-policy-3.13.1-192.el7.noarch 34/37
Verifying : libselinux-2.5-12.el7.x86_64 35/37
Verifying : libselinux-utils-2.5-12.el7.x86_64 36/37
Verifying : selinux-policy-targeted-3.13.1-192.el7.noarch 37/37
Installed:
docker-ce.x86_64 3:20.10.22-3.el7
Dependency Installed:
audit-libs-python.x86_64 0:2.8.5-4.el7 checkpolicy.x86_64 0:2.5-8.el7
container-selinux.noarch 2:2.119.2-1.911c772.el7_8 containerd.io.x86_64 0:1.6.13-3.1.el7
docker-ce-cli.x86_64 1:20.10.22-3.el7 docker-ce-rootless-extras.x86_64 0:20.10.22-3.el7
docker-scan-plugin.x86_64 0:0.23.0-3.el7 fuse-overlayfs.x86_64 0:0.7.2-6.el7_8
fuse3-libs.x86_64 0:3.6.1-4.el7 libcgroup.x86_64 0:0.41-21.el7
libseccomp.x86_64 0:2.3.1-4.el7 libsemanage-python.x86_64 0:2.5-14.el7
policycoreutils-python.x86_64 0:2.5-34.el7 python-IPy.noarch 0:0.75-6.el7
setools-libs.x86_64 0:3.3.8-4.el7 slirp4netns.x86_64 0:0.4.3-4.el7_8
Dependency Updated:
audit.x86_64 0:2.8.5-4.el7 audit-libs.x86_64 0:2.8.5-4.el7
libselinux.x86_64 0:2.5-15.el7 libselinux-python.x86_64 0:2.5-15.el7
libselinux-utils.x86_64 0:2.5-15.el7 libsemanage.x86_64 0:2.5-14.el7
libsepol.x86_64 0:2.5-10.el7 policycoreutils.x86_64 0:2.5-34.el7
selinux-policy.noarch 0:3.13.1-268.el7_9.2 selinux-policy-targeted.noarch 0:3.13.1-268.el7_9.2
Complete!
4: 开启Docker服务
[root@localhost]# sudo service docker start
Redirecting to /bin/systemctl start docker.service
其他
# 安装指定版本的Docker-CE:
# Step 1: 查找Docker-CE的版本:
# yum list docker-ce.x86_64 --showduplicates | sort -r
#   Loading mirror speeds from cached hostfile
#   Loaded plugins: branch, fastestmirror, langpacks
#   docker-ce.x86_64            17.03.1.ce-1.el7.centos            docker-ce-stable
#   docker-ce.x86_64            17.03.1.ce-1.el7.centos            @docker-ce-stable
#   docker-ce.x86_64            17.03.0.ce-1.el7.centos            docker-ce-stable
#   Available Packages
# Step2 : 安装指定版本的Docker-CE: (VERSION 例如上面的 17.03.0.ce.1-1.el7.centos)
# sudo yum -y install docker-ce-[VERSION]
# 注意:在某些版本之后,docker-ce安装出现了其他依赖包,如果安装失败的话请关注错误信息。例如 docker-ce 17.03 之后,需要先安装 docker-ce-selinux。
# yum list docker-ce-selinux- --showduplicates | sort -r
# sudo yum -y install docker-ce-selinux-[VERSION]
# 通过经典网络、VPC网络内网安装时,用以下命令替换Step 2中的命令
# 经典网络:
# sudo yum-config-manager --add-repo http://mirrors.aliyuncs.com/docker-ce/linux/centos/docker-ce.repo
# VPC网络:
# sudo yum-config-manager --add-repo http://mirrors.could.aliyuncs.com/docker-ce/linux/centos/docker-ce.repo
发表在 默认分类
CentOS 7 使用yum安装Docker CE已关闭评论
修改Mac系统Dock显示隐藏时间

# 先修改停留时间(后面数字为停留时间)如:
defaults write com.apple.dock autohide-delay -int 0      ##(时间设为最短)
defaults write com.apple.dock autohide-delay -int 0.5    ##(时间设为 0.5s)
defaults write com.apple.dock autohide-delay -int 10     ##(时间设为 10s)
#使设置生效
killall Dock
发表在 默认分类
修改Mac系统Dock显示隐藏时间已关闭评论
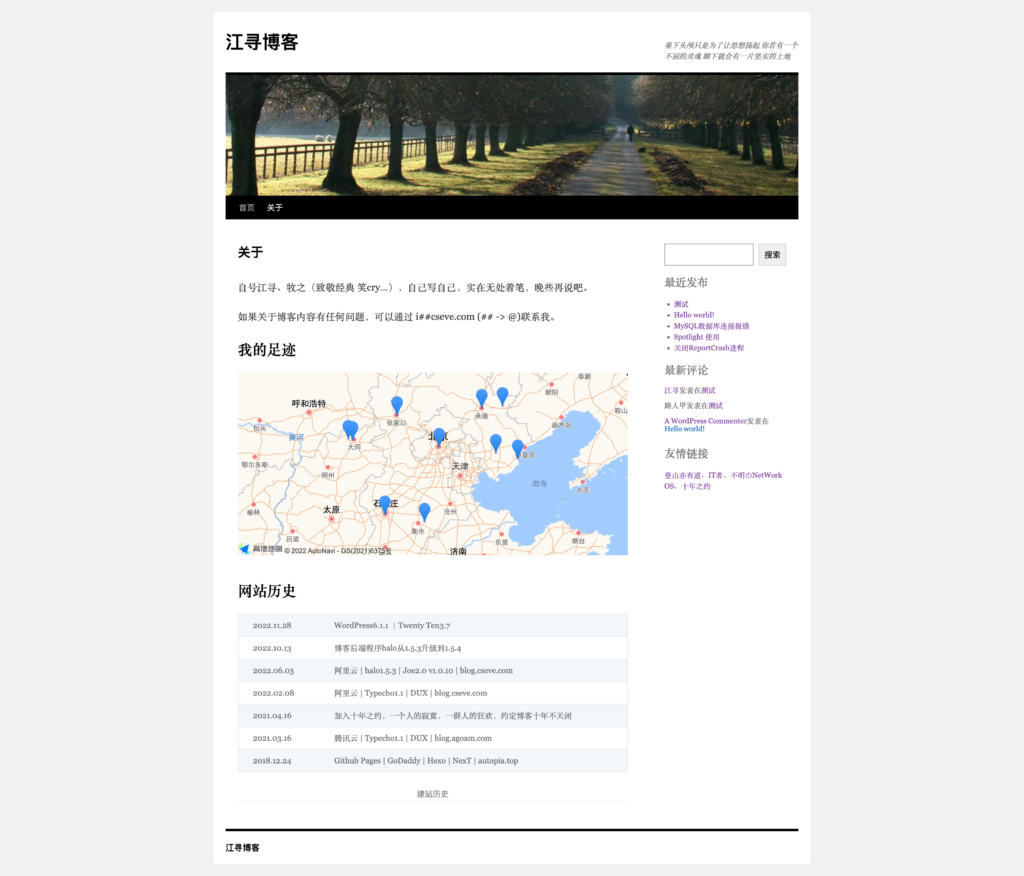
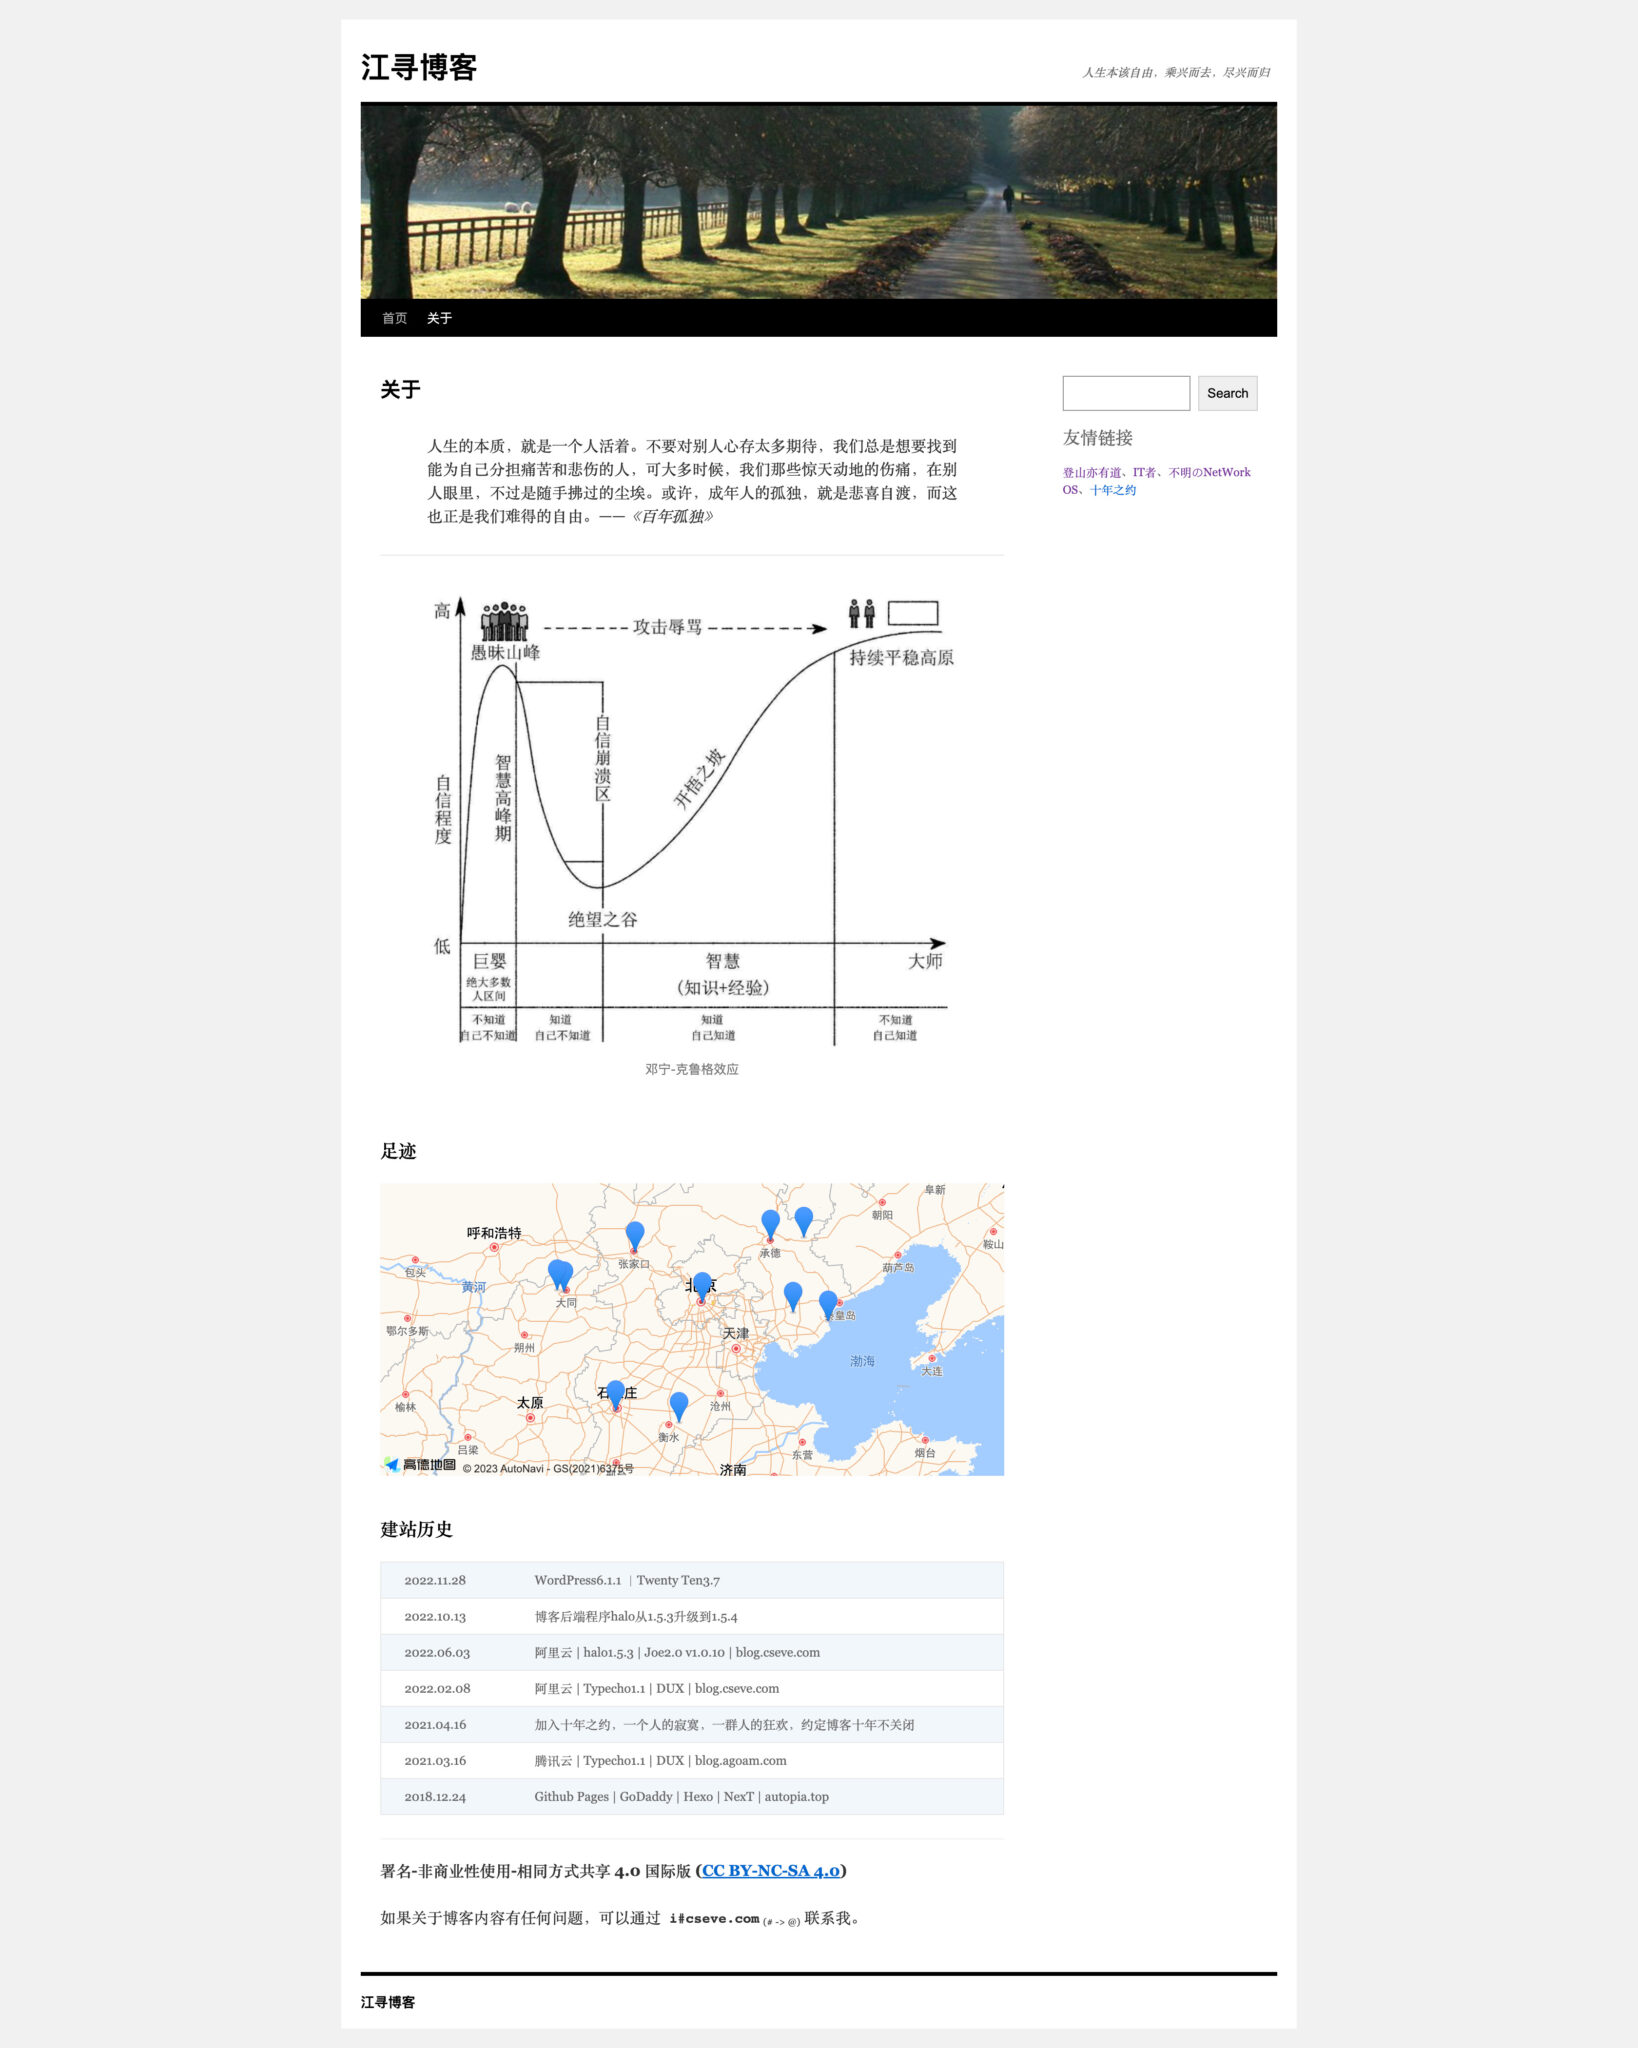
关于博客程序更换的一点思考
最近把博客程序从Halo换到了WordPress,还记得第一次买学生机装的就是WordPress,还是逃不过真香定律啊,那时候觉得WordPress臃肿,而且设计的使用方式有点让我摸不着头脑,好多操作逻辑、操作流程不是很符合我的思考方式,现在觉得,是那时候是我见识的不够多。
古语有云:操千曲而后晓声,观千剑而后识器。直到现在,尝试过Hexo、Hugo、Jekyll、Typecho、ZBlog一众博客建站程序之后,突然觉得,WordPress才是最适合我的那一个。类似Hexo、Jekyll、Hugo这种静态博客在搭建上肯定要简单一些,部署方面可以选择GitHub、Gitee、Coding这种托管平台、不需要主机或者服务器的费用、但写完博客需要编译确实让我有点头疼、使用过Jekyll不需要部署的方案、使用的Hux大佬的主题、只需要简单的git push就好了,但是静态博客的评论也是一个问题,当然,也有会Disqus/Livere(来必力)/Valine、Gitment/Gitalk/utterances/Vssue等一众方案,但是我不是很喜欢这种嵌入式分离的结构,因为有的插件总是在主程序加载完成后再次渲染,就像代码的格式主题渲染一次后插件再次渲染,视觉上就是内容有替换的过程,WP也有这个问题。响应速度快是静态博客的一大优点,所以相对来说,Halo、WP、Zblog是比较慢一点的,当然只是相对来说。
博客文章内容的处理方式是我喜欢WP的另一个原因。不管是静态的Hexo、Jekyll,还是动态的Typecho、Halo,无一列外的选择了转化Markdown为HTML的方式展示文章,这就导致了我无法对图片进行很好的排版,WP的块编辑器很好的解决了这一问题。
删繁就简,回归本真。这次博客改版我去掉了上一版中很多内容,也是为了把中心放到文章内容上。归档页是很多博客的标配,但去掉了好像也真的无伤大雅,还有与之类似的标签页、分类页,当然看着满满的文章标题是很有成就感的,但这次我没有加归档页,而是考虑是否在侧边栏加入一个归档组件。相册页是很多博客都有的一个菜单,好的照片确实不错,但我好像没有什么拿得出手的照片,等有了再考虑这个吧。留言页,觉得这个大可不必,随便找一篇文章留言或者发邮件吧。日志或者说动态页,上一版Halo博客我用的很频繁,当作微信朋友圈或者QQ空间用了,简短的想法,又不至于发一篇文章,这个板块确实有其存在的意义,但我想放弃碎片化的输出,打算系统的整理自己的想法,互联网时代的垃圾内容已经够多了,我就尽量不再输出互联网垃圾了,再者说,人每天都会产生很多想法,但大多数没有实际意义,当然随时记录自己的想法是一个很好的习惯,但不必要发到这里,我还是选择其他方式。
WP的插件系统是很丰富的。装完之后我装了好几个插件:KaTeX,WP Fastest Cache、SyntaxHighlighter Evolved…不得不说这很方便,虽然我觉得使用插件丰富功能的方式比较排他,但这也是另一种组件化吧。就拿代码高亮插件来说,标记某一行或者某几行代码在静态博客是很难实现的一个功能,支持Latex也会使加载速度变慢,但WP插件很好的解决了这个问题。
对于主题来说,以前无尽的折腾主题,改颜色、改动画、各种魔改,而忘记了最重要的内容,我虽然知道这一点并努力避免,然而我依然不能很好的实践,这次我努力不陷入这个漩涡之中。这次没有黑暗模式,而且我突然觉得,黑色主题的时代虽然已经到来,但还不够成熟,我安装完博客看着文章的图片深思,诸如代码图片这种黑色格调的板块好像与博客格格不入、以前的Halo里面的主题也有这个问题,我曾想过深浅色模式使用不同的代码主题,但图片我怎么也不能很好的解决,虽然目前有一些处理方案,但我觉得可以等等。博客上传图片大小限制2M我决定保留,虽然有其他方案转换为webp格式,但转换也需要服务器资源啊。
有人穷途末路,夕阳西下,有人崭新起点,旭日东升。
Hello world!
Welcome to WordPress. This is your first post. Edit or delete it, then start writing!
MySQL数据库连接报错
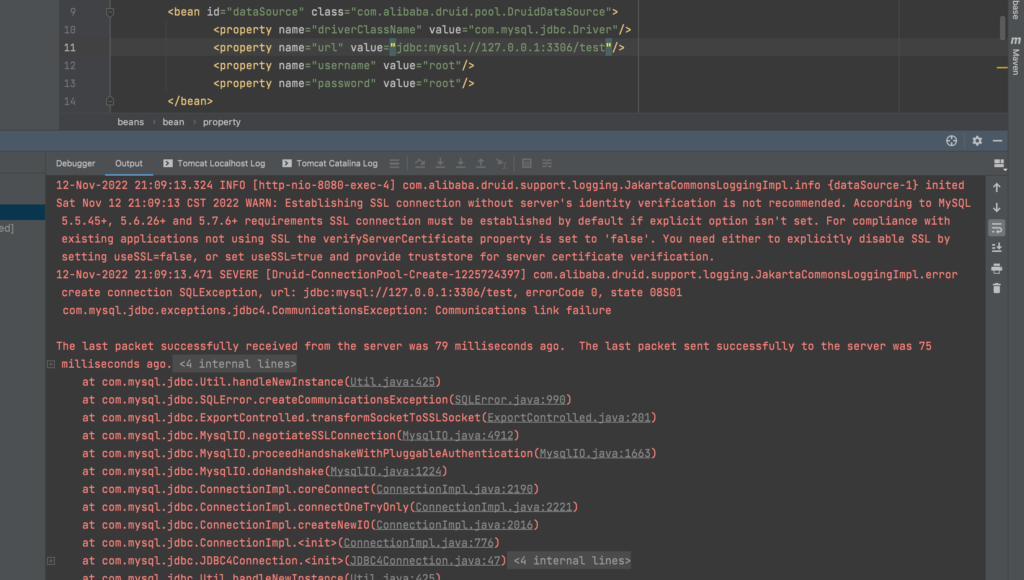
解决方法
在数据库连接后面加
?useUnicode=true&useSSL=false&characterEncoding=utf-8&serverTimezone=Asia/Shanghai&useAffectedRows=true&allowMultiQueries=true
如果是xml文件,加
?useUnicode=true&useSSL=false&characterEncoding=utf-8&serverTimezone=Asia/Shanghai&useAffectedRows=true&allowMultiQueries=true
报错信息
12-Nov-2022 21:09:13.324 INFO [http-nio-8080-exec-4] com.alibaba.druid.support.logging.JakartaCommonsLoggingImpl.info {dataSource-1} inited
Sat Nov 12 21:09:13 CST 2022 WARN: Establishing SSL connection without server's identity verification is not recommended. According to MySQL 5.5.45+, 5.6.26+ and 5.7.6+ requirements SSL connection must be established by default if explicit option isn't set. For compliance with existing applications not using SSL the verifyServerCertificate property is set to 'false'. You need either to explicitly disable SSL by setting useSSL=false, or set useSSL=true and provide truststore for server certificate verification.
12-Nov-2022 21:09:13.471 SEVERE [Druid-ConnectionPool-Create-1225724397] com.alibaba.druid.support.logging.JakartaCommonsLoggingImpl.error create connection SQLException, url: jdbc:mysql://127.0.0.1:3306/test, errorCode 0, state 08S01
com.mysql.jdbc.exceptions.jdbc4.CommunicationsException: Communications link failure
The last packet successfully received from the server was 79 milliseconds ago. The last packet sent successfully to the server was 75 milliseconds ago.
at sun.reflect.NativeConstructorAccessorImpl.newInstance0(Native Method)
at sun.reflect.NativeConstructorAccessorImpl.newInstance(NativeConstructorAccessorImpl.java:62)
at sun.reflect.DelegatingConstructorAccessorImpl.newInstance(DelegatingConstructorAccessorImpl.java:45)
at java.lang.reflect.Constructor.newInstance(Constructor.java:423)
at com.mysql.jdbc.Util.handleNewInstance(Util.java:425)
at com.mysql.jdbc.SQLError.createCommunicationsException(SQLError.java:990)
at com.mysql.jdbc.ExportControlled.transformSocketToSSLSocket(ExportControlled.java:201)
at com.mysql.jdbc.MysqlIO.negotiateSSLConnection(MysqlIO.java:4912)
at com.mysql.jdbc.MysqlIO.proceedHandshakeWithPluggableAuthentication(MysqlIO.java:1663)
at com.mysql.jdbc.MysqlIO.doHandshake(MysqlIO.java:1224)
at com.mysql.jdbc.ConnectionImpl.coreConnect(ConnectionImpl.java:2190)
at com.mysql.jdbc.ConnectionImpl.connectOneTryOnly(ConnectionImpl.java:2221)
at com.mysql.jdbc.ConnectionImpl.createNewIO(ConnectionImpl.java:2016)
at com.mysql.jdbc.ConnectionImpl.<init>(ConnectionImpl.java:776)
at com.mysql.jdbc.JDBC4Connection.<init>(JDBC4Connection.java:47)
at sun.reflect.NativeConstructorAccessorImpl.newInstance0(Native Method)
at sun.reflect.NativeConstructorAccessorImpl.newInstance(NativeConstructorAccessorImpl.java:62)
at sun.reflect.DelegatingConstructorAccessorImpl.newInstance(DelegatingConstructorAccessorImpl.java:45)
at java.lang.reflect.Constructor.newInstance(Constructor.java:423)
at com.mysql.jdbc.Util.handleNewInstance(Util.java:425)
at com.mysql.jdbc.ConnectionImpl.getInstance(ConnectionImpl.java:386)
at com.mysql.jdbc.NonRegisteringDriver.connect(NonRegisteringDriver.java:330)
at com.alibaba.druid.pool.DruidAbstractDataSource.createPhysicalConnection(DruidAbstractDataSource.java:1657)
at com.alibaba.druid.pool.DruidAbstractDataSource.createPhysicalConnection(DruidAbstractDataSource.java:1723)
at com.alibaba.druid.pool.DruidDataSource$CreateConnectionThread.run(DruidDataSource.java:2838)
Caused by: javax.net.ssl.SSLHandshakeException: No appropriate protocol (protocol is disabled or cipher suites are inappropriate)
at sun.security.ssl.HandshakeContext.<init>(HandshakeContext.java:171)
at sun.security.ssl.ClientHandshakeContext.<init>(ClientHandshakeContext.java:103)
at sun.security.ssl.TransportContext.kickstart(TransportContext.java:220)
at sun.security.ssl.SSLSocketImpl.startHandshake(SSLSocketImpl.java:437)
at sun.security.ssl.SSLSocketImpl.startHandshake(SSLSocketImpl.java:415)
at com.mysql.jdbc.ExportControlled.transformSocketToSSLSocket(ExportControlled.java:186)
... 18 more
......
12-Nov-2022 21:09:18.848 INFO [main] org.apache.coyote.AbstractProtocol.destroy Destroying ProtocolHandler ["ajp-nio-8009"]
Disconnected from server
Spotlight 使用
(留坑,待填…)
在 Mac 上使用“聚焦”搜索
“聚焦”可以帮助你快速找到 Mac 上的 App、文稿、电子邮件和其他项目。借助 Siri 建议,你还可以获取新闻、体育赛事比分、天气状况和股票价格等信息。“聚焦”甚至可以为你进行计算和转换。
唤出搜索框:按下 Command-空格键
你可以将“聚焦”窗口拖到桌面上的任意位置。
在“聚焦”中进行计算和转换
你可以在“聚焦”搜索栏中输入数学表达式、金额、温度或度量单位,搜索栏中会立即显示转换或计算结果。
- 计算:输入数学表达式,如 956*23.94 或 2020/15。
- 货币转换:输入金额,如 100 美元、100 日元或“300 克朗转换成欧元”。
- 温度转换:输入温度,如 98.8F、32C 或“340K 转换成华氏度”。
- 单位转换:输入度量单位,例如 25 磅、54 码、23 英石或“32 英尺转换成米”。
Mac 上的“聚焦”键盘快捷键 :
| 快捷键 | 功能 |
| command + b | 使用浏览器搜索 |
| command + r | 打开文件所在文件夹 |
| 输入kind:pdf fileName | 搜索指定类型文件 |
| … |
发表在 默认分类
Spotlight 使用已关闭评论